Mega Menus is an advanced navigation feature that enhances the user experience by allowing you to display rich content, such as product categories, images, and descriptions, directly within your menu. This feature is ideal for businesses with multiple offerings, such as e-commerce stores, software providers, or service-based companies, looking to organize their website or funnel navigation in a visually engaging and accessible way.
Key Features and Benefits
- Enhanced Navigation: Showcase product categories, team information, or service details at a glance without overwhelming users.
- Customizable Content: Add elements like images, text, and buttons to create dynamic and visually appealing menus.
- Improved User Experience: Help visitors find what they need faster, reducing bounce rates and improving conversions.
- Brand Consistency: Customize the menu’s design to match your website’s branding, ensuring a cohesive appearance.
How to Set Up and Customize a Mega Menu
Step 1: Access Your Website or Funnel
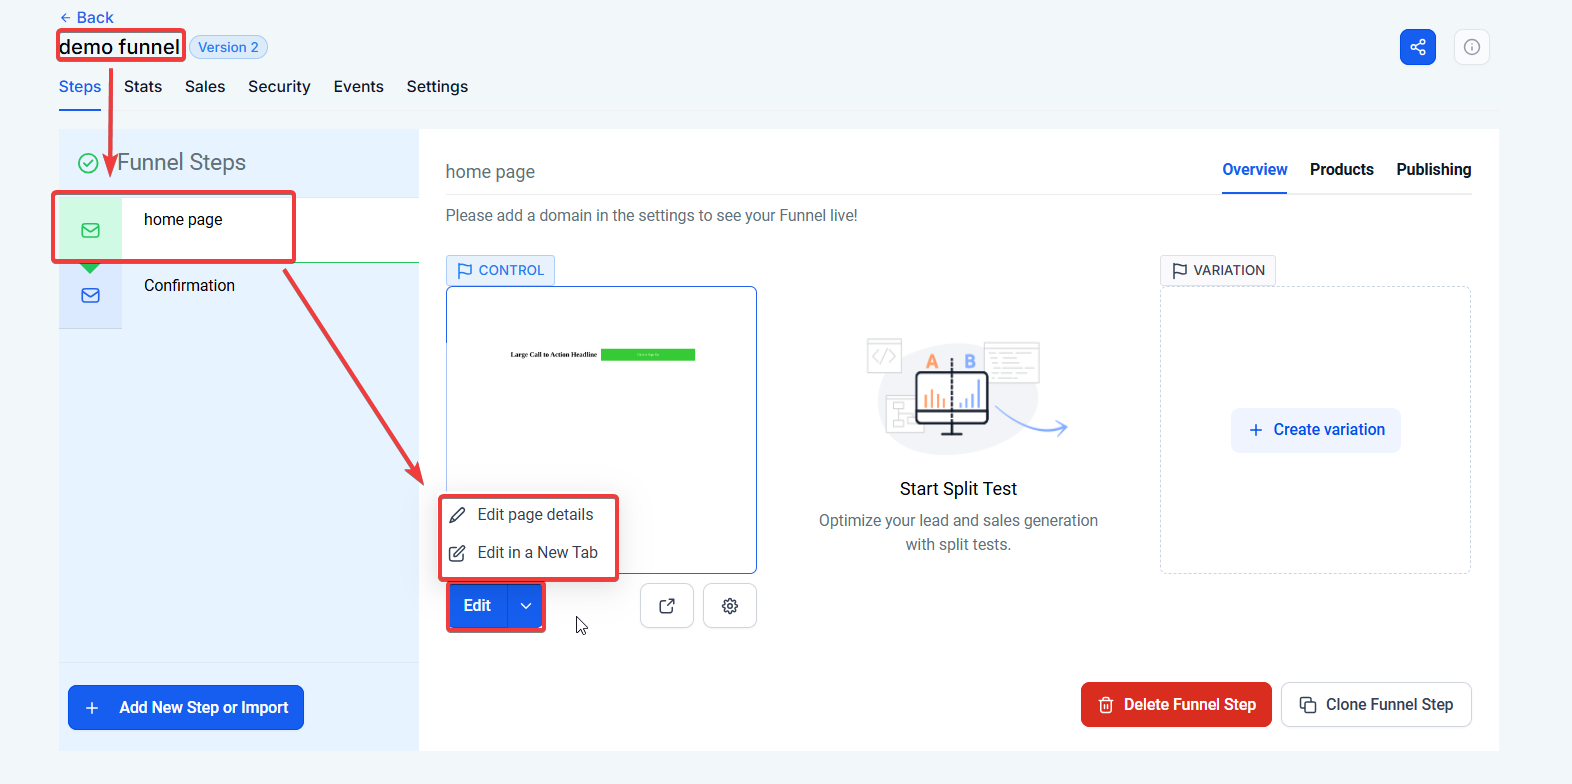
- Navigate to Sites > Websites or Funnels in your dashboard.
- Select the website or funnel you want to edit and open the desired page in the editor.
Step 2: Add a Navigation Menu
- Scroll to the top of the page, click Add Section, and select Full Width.
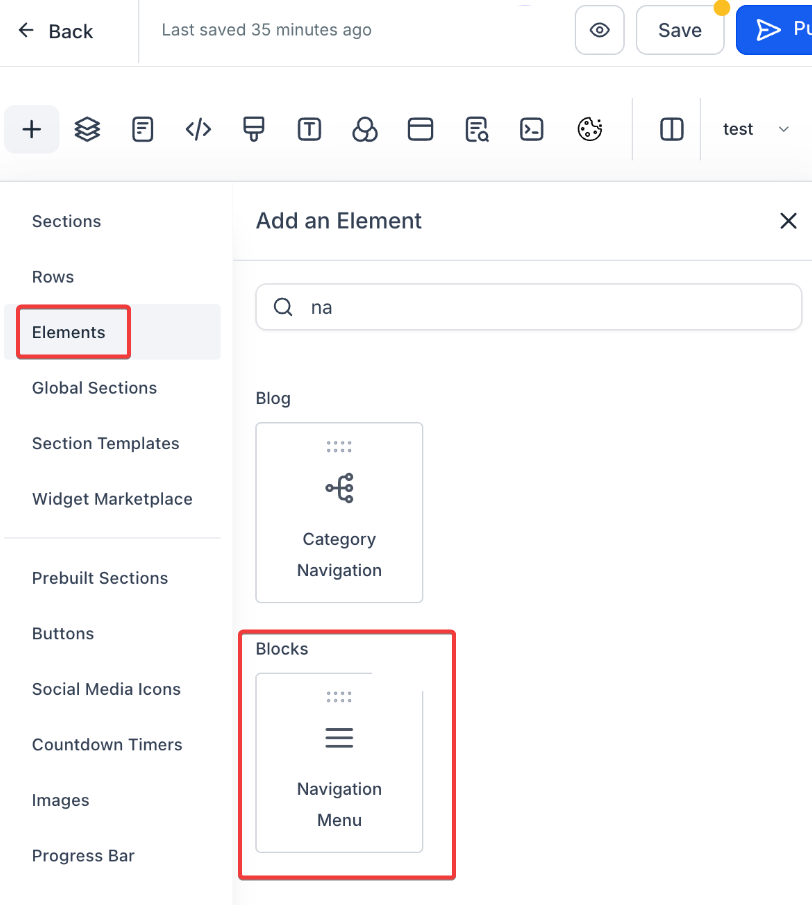
- Inside the new section, click Add Row, select One Column, and then click Add Element.
- Search for Navigation Menu in the element search bar and drag it to your row.
Step 3: Enable Mega Menu
- In the navigation menu settings, click Add Item.
- Select Mega Menu as the item type.

- Rename the item to represent your desired category (e.g., “Products,” “Teams,” or “Services”).
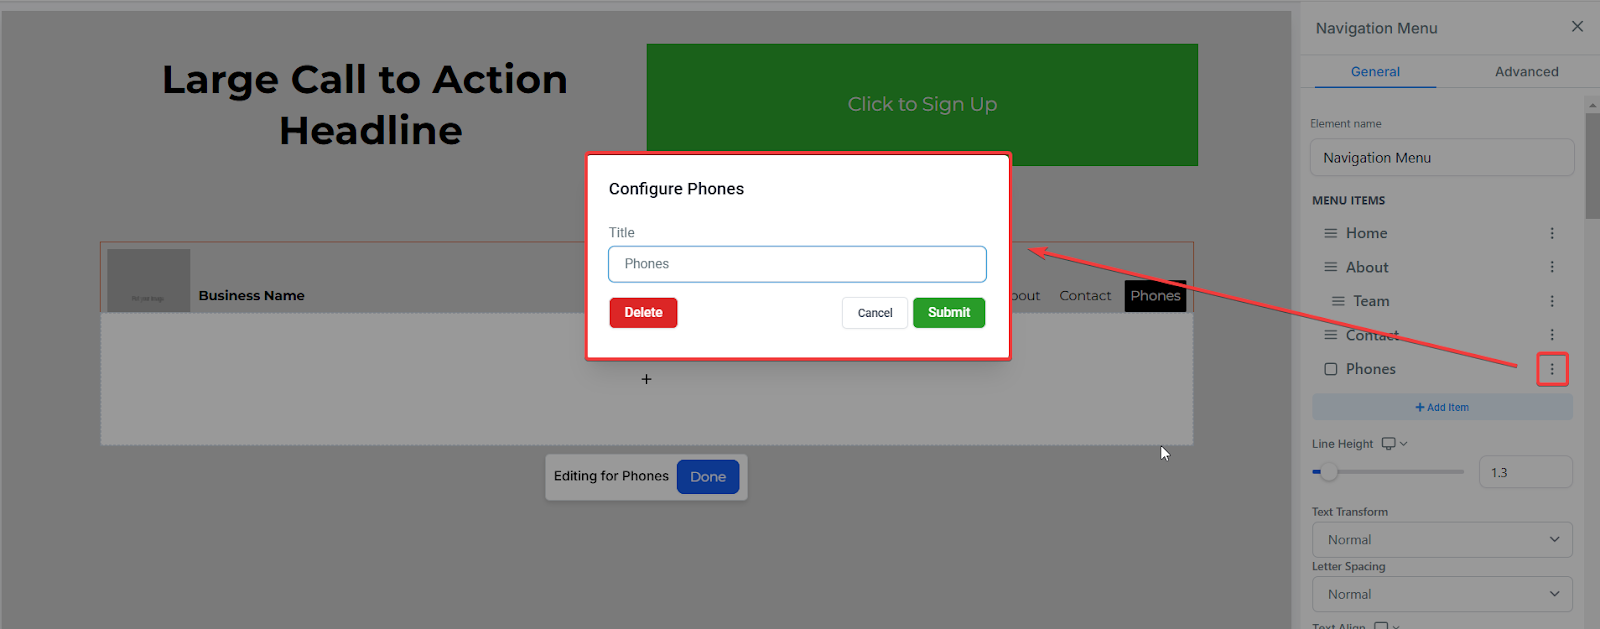
- Repeat this process to create additional mega menu items as needed.
Step 4: Add Content to Mega Menus
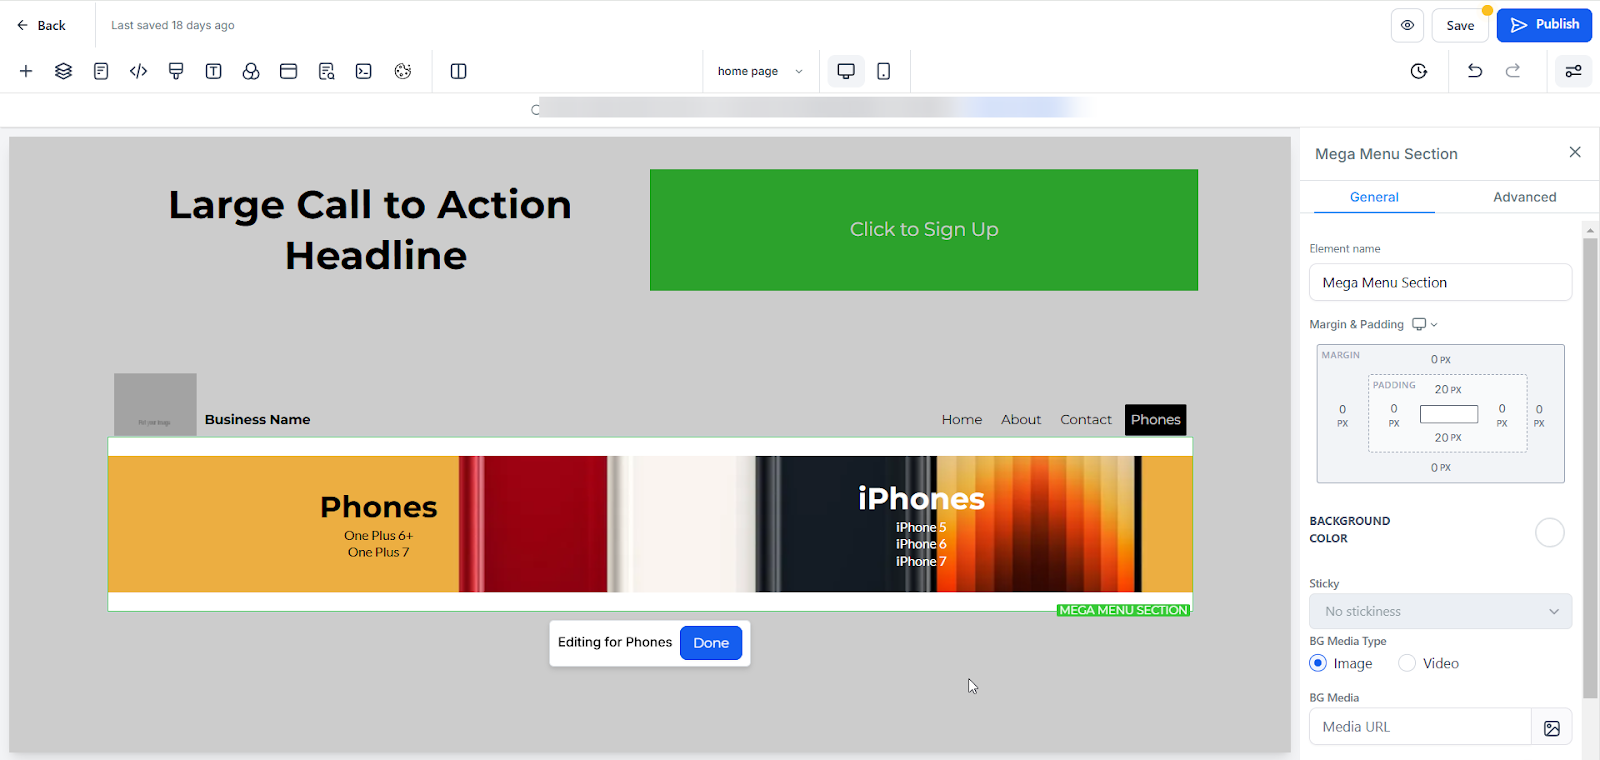
- Select a mega menu item and click Edit to start adding content.
- Add rows and columns to structure your menu.
- Example: For a product menu, create columns for categories like Phones, TVs, and Laptops.
- Drag and drop elements such as:
- Headlines: For category titles (e.g., “iPhones” or “Android Phones”).
- Paragraphs: To list specific items or product descriptions.
- Images: To visually represent products or services.
Step 5: Add Links and Buttons
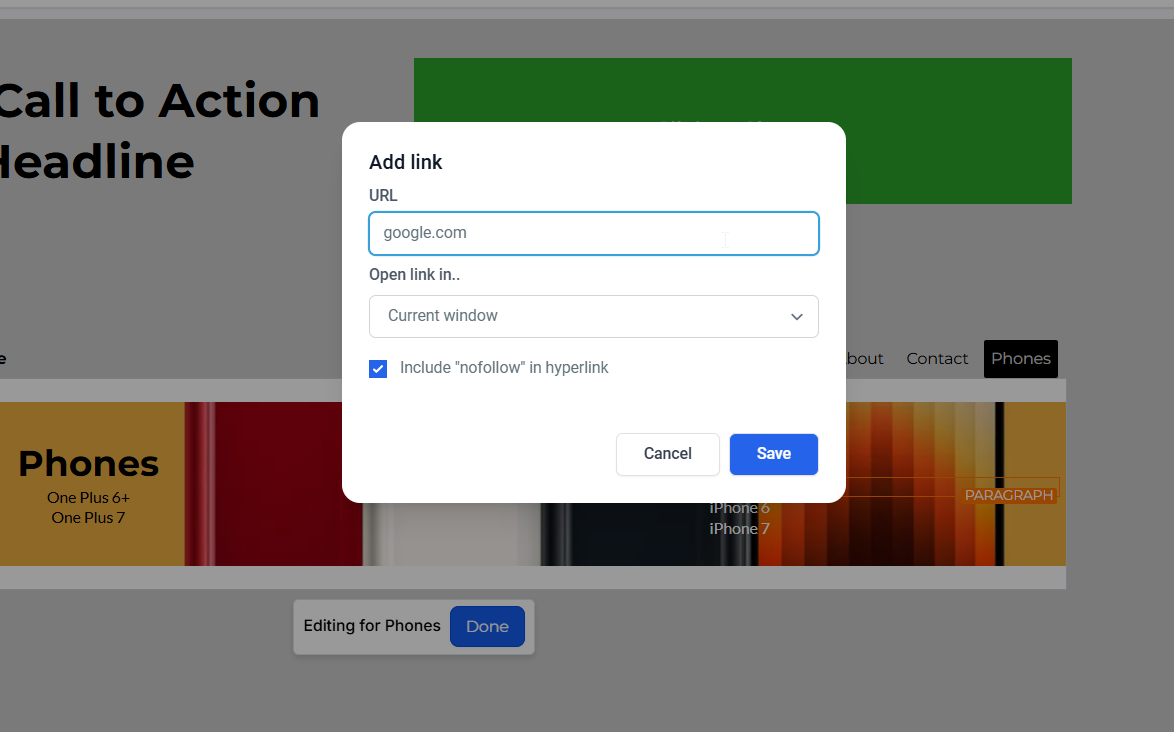
- Link menu items to specific pages or external websites:
- Click on any element (e.g., text or image).
- Navigate to the Actions tab and select Go to Website or Go to Page.
- Enter the URL or select a page from your site.

Step 6: Dropdown Icon and Submenu Support
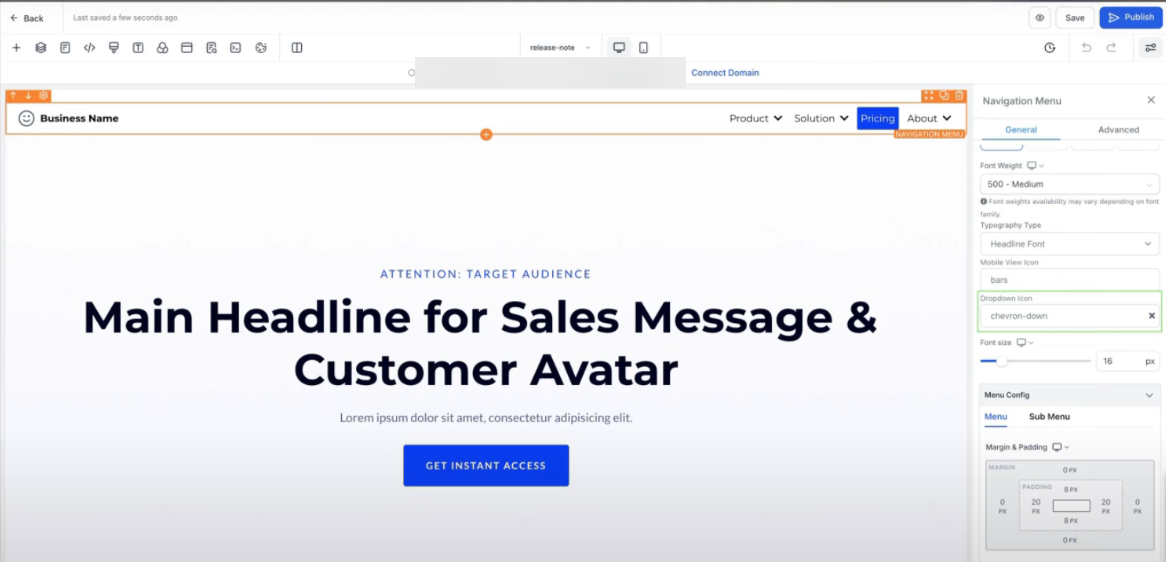
The Mega Menu includes dropdown icon support for submenus, further enhancing navigation and usability.
Usage
- Dropdown Icon for Expansion/Collapse: Intuitive dropdown arrows indicate expandable menu items, improving clarity.
- Submenu Link Support: Submenus allow direct linking to specific pages or external URLs.
How to Enable:
- Add or Edit Navigation Menu:
- Open the Funnel or Website Builder and click on the Navigation Menu element.
- Customize Dropdown Icons:
- In the Style Editor, locate the Dropdown Icon property and enable it.
- Enable Submenu Linking:
- Click the three dots next to a menu item in the Style Editor and toggle on Add Link.
Step 6: Preview and Save
- Once all items are added, click Save and then Preview to see how the menu looks.
- Adjust spacing, colors, or typography in the settings to ensure the menu matches your branding.

Pro Tips for Using Mega Menus Effectively
- Focus on Clarity: Use concise headlines and descriptions to avoid overwhelming users.
- Incorporate Visuals: Add images or icons to make navigation intuitive and visually appealing.
- Highlight Important Pages: Use bold text or contrasting colors for high-priority links.
- Maintain Consistency: Ensure menu styling aligns with your website’s design and branding.
- Test Responsiveness: Preview the mega menu on mobile and desktop to confirm it works seamlessly on all devices.
Use Cases
- E-commerce Stores:
- Organize products into categories like “Phones,” “Accessories,” and “Wearables.”
- Add subcategories for detailed product listings, images, and prices.
- Service-Based Businesses:
- Highlight services such as “Consulting,” “Development,” and “Support.”
- Include brief descriptions and links to service pages for easy navigation.
- Software Providers:
- Showcase product features under categories like “Features,” “Pricing,” and “Case Studies.”
- Include call-to-action buttons like “Learn More” or “Start Free Trial.”
FAQ
Q1: What types of content can I add to a Mega Menu?
You can add various elements, including text, images, buttons, and links. Additionally, you can structure your menu with multiple rows and columns to organize content effectively.
Q2: Can I customize the colors and fonts of my Mega Menu?
Yes, the mega menu allows full customization of background colors, text colors, fonts, and even spacing to align with your branding.
Q3: How can I link menu items to specific pages?
Select the element (e.g., text or image) you want to link, navigate to the Actions tab, and choose a destination page or external URL.
Q4: Does the Mega Menu work on mobile devices?
Yes, mega menus are responsive. However, it’s essential to test the menu on mobile devices to ensure a user-friendly experience.
Was this article helpful?
That’s Great!
Thank you for your feedback
Sorry! We couldn't be helpful
Thank you for your feedback
Feedback sent
We appreciate your effort and will try to fix the article