Processing refunds efficiently is crucial for maintaining customer satisfaction and managing financial transactions smoothly. In this guide, we will walk you through the simple steps to issue a refund directly from your dashboard, ensuring you can handle refunds quickly without needing to access your payment provider’s platform.
Our refund processing feature is a convenient tool integrated into our payment platform, allowing businesses to manage refunds for transactions made through multiple payment providers, such as Stripe, Authorize.net, NMI, and PayPal. It supports various payment methods, including Google Pay, Apple Pay, and card payments. The feature allows you to:
- Process full or partial refunds for transactions, giving businesses flexibility in handling customer refunds.
- Track successful and failed refund attempts on the Transaction Details page, enabling businesses to monitor refund history and amounts for specific transactions.
- Easily manage refunds for various payment providers and methods from one central platform, streamlining the refund process and reducing manual effort.
How to Process a Refund
1. Access the Payments Section
- Navigate to Payments in your dashboard.
2. Locate the Transaction
- Go to Transactions to view a list of all transactions.
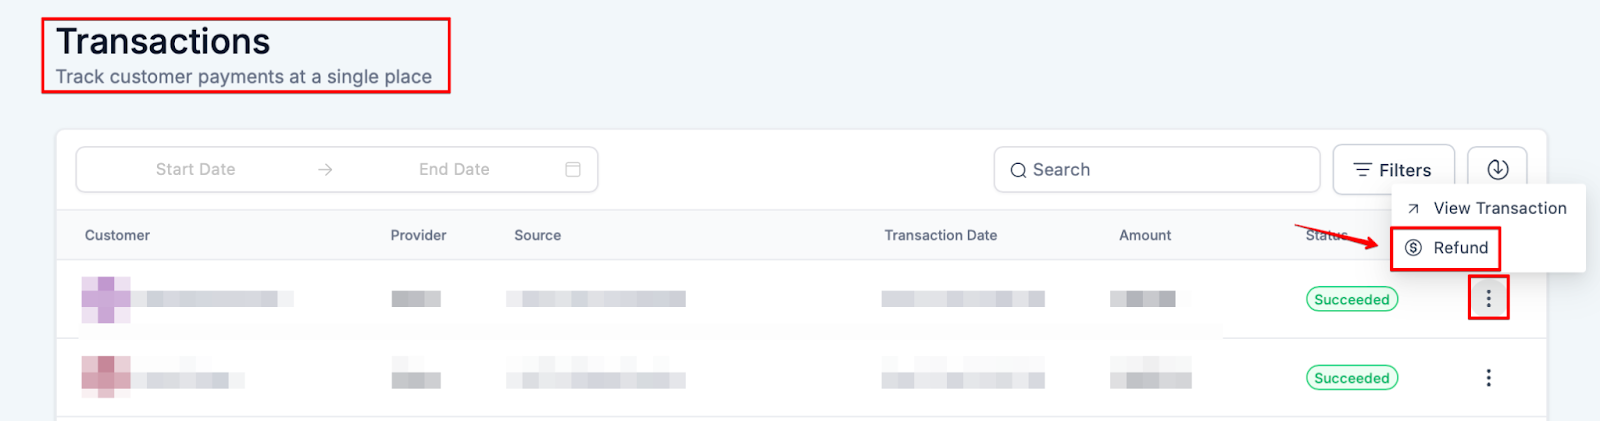
3. Select the Refund Action
- Find the successful transaction for which you want to issue a refund.
- Click on the three dots (more options) next to the transaction.
- Select the Refund action from the available options.
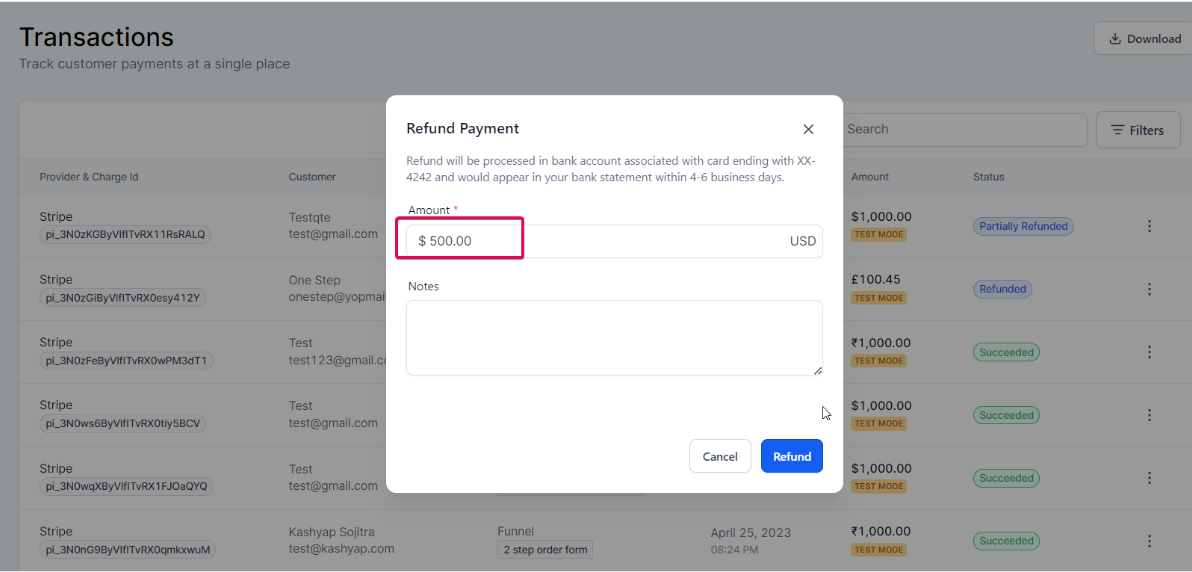
Full Refund:
If you want to issue a full refund, it will pre-populate the total amount of the transaction in this window for you automatically.

Partial Refund
You can edit the pre-populated amount to anything less than the Full amount of that transaction if you want to issue a Partial Refund.
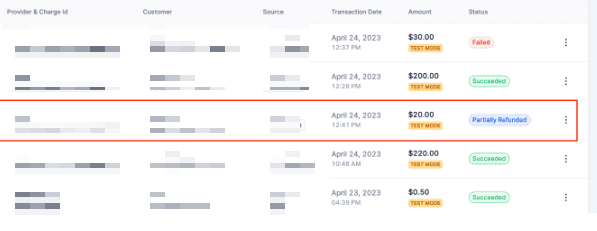
4. View Refund Details
- The transaction details page will show the status of successful and failed refunds for that transaction.

5. Process Refunds
- You can process refunds directly from this page, without needing to access your payment provider’s dashboard separately.
FAQs:
1. How do I access the Payments section?
Navigate to Payments in your dashboard to start processing refunds.
2. How can I find the transaction I want to refund?
Go to Transactions within the Payments section to view a list of all transactions.
3. What steps do I take to select the refund action?
- Locate the successful transaction for which you want to issue a refund.
- Click on the three dots (more options) next to the transaction.
- Select the Refund action from the options that appear.
4. How can I view the refund details?
The transaction details page will display the status of any successful or failed refunds associated with that transaction.
5. Can I process refunds without accessing my payment provider’s dashboard?
Yes, you can process refunds directly from the transaction details page in your dashboard, eliminating the need to log in to your payment provider’s dashboard separately.

Was this article helpful?
That’s Great!
Thank you for your feedback
Sorry! We couldn't be helpful
Thank you for your feedback
Feedback sent
We appreciate your effort and will try to fix the article